Moth Photography Tip: Orientation of Moth Photos
As we get ready for National Moth Week (July 22-30, 2023) I’d like to pass on a photography tip that one of my iNaturalist moth mentors taught me early on to facilitate moth identification. As a newbie, I was taking photos of only the top (or dorsal side) of the moth in almost every case. That’s fine for “flat” moths like this Brown-shaded Gray where all the important details necessary for the identification are easily seen. But for moths that have a more cylindrical shape, that won’t really won’t cut it in many cases.
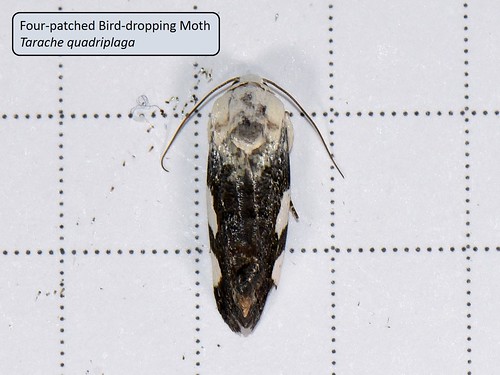
As an example, check out the series below where I started with a dorsal shot of one of the Tarache bird-dropping moths. You can already see that image is not optimum for identification to species. However, the following lateral shots of three different Tarache species capture the important field marks. Getting the lateral shots? I typically step to the side of the moth as it sits on the sheet or other surface and position my camera to get the moth with head and body straight up or down, or head and body level, facing left or right. I then use my photo editor to rotate the moth so it faces left or right, with the body level, as shown in the lateral images here.


On the lateral photos I marked in red some of the areas used for species identification, but rather than discuss those here, I’ll refer you to the observation below where Chuck provides excellent detail to differentiate Four-patched and Four-spotted Bird-dropping Moths, which are quite similar in appearance.
https://www.inaturalist.org/observations/87762815
Enjoy National Moth Week!


Comentarios
Agregar un comentario